Beacons Are Dead, Long Live Beacons!

What Happened to Eddystone Beacons?

On December 7, 2020 Google depreciated it’s Beacon Platform, which  iIncluded  the Beacon Dashboard, Proximity API, and the Eddystone Format.

A Brief History of Beacons

Apple announced the iBeacon Platform in 2013. These beacons were part of a class of Bluetooth devices known as Bluetooth Low Energy (BLE). These devices broadcast a unique identifier to nearby Phones and Tablets. Using this identifier, applications could determine the approximate distance to the beacon for indoor and offline navigation. Retailers began to use this unique identifier to present offers to shoppers via their apps.

In 2015, Google announced their competing BLE platform, Eddystone. In addition to the unique identifier, this platform could also broadcast a URL. These beacons could be registered via the Proximity API, related data stored via the Proximity API in a database and viewed and managed with the Beacon Dashboard. This system enabled developers to easily develop applications against this backend and display data associated with the beacon in those applications.

Why Did the Google Beacon Platform Fail?


Google derives most of their income from advertising; therefore they built their BLE platform with advertising in mind. Their original implementation displayed notifications from nearby Eddystone Beacons. Shoppers were bombarded with notifications and hated this experience.

In December, 2018, Google stopped these notifications, however,Developers could still use the Proximity API and Beacon Dashboard with the Apps they built. As the beacon market developed, the Eddystone Platform did not keep up. Vendors began making beacons with proprietary protocols and more sensors. Developers could use these beacons to do things like get the temperature, ambient light levels, sense movement, humidity, etc.

Won’t the Upcoming Ultra Wide Band (UWB) Tags from Apple and Samsung Replace these Beacons?

UWB Tags are much more precise than existing BLE beacons.Using the most recent high end phones, users will be able to locate items within about 5 feet (1.5 meters) versus 16 feet (5 meters) with current BLE beacons.

The initial implementation of these tags will primarily be for finding lost personal items. If your phone is in range of the item, it will discover it. It also appears that the tags will send out a signal that any phone with an up to date OS will forward to the platform of the phone’s manufacturer so you can find these tags when you are not in range of the phone.

We don’t believe that these tags will replace the current generation of BLE beacons for a few reasons:

  • These UWB Tags will require a new (circa 2020) Apple or Samsung Phone
  • They will not be compatible with most of the existing gateways
  • These tags will most likely initially only work with the proprietary applications on Apple or Samsung Phones
  • Apple and Samsung UWB seem to be geared towards finding lost items, not providing all of the other sensor data that current BLE beacons do
  • BLE Beacons will be much, much cheaper than these UWB Tags will be

Based on these reasons, we predict that UWB tags will eventually complement BLE Beacon implemenatons. We will have to see if and how much Apple and Samsung will allow developers access to their SDKs in order to develop applications that will work with these tags. UWB tags and gateways are starting to become available from vendors outside of Apple and Samsung.  So if more precision is needed, applications and gateways will use UWB tags in addition to the existing BLE beacons.

What do Current BLE Beacon Deployments Look Like?

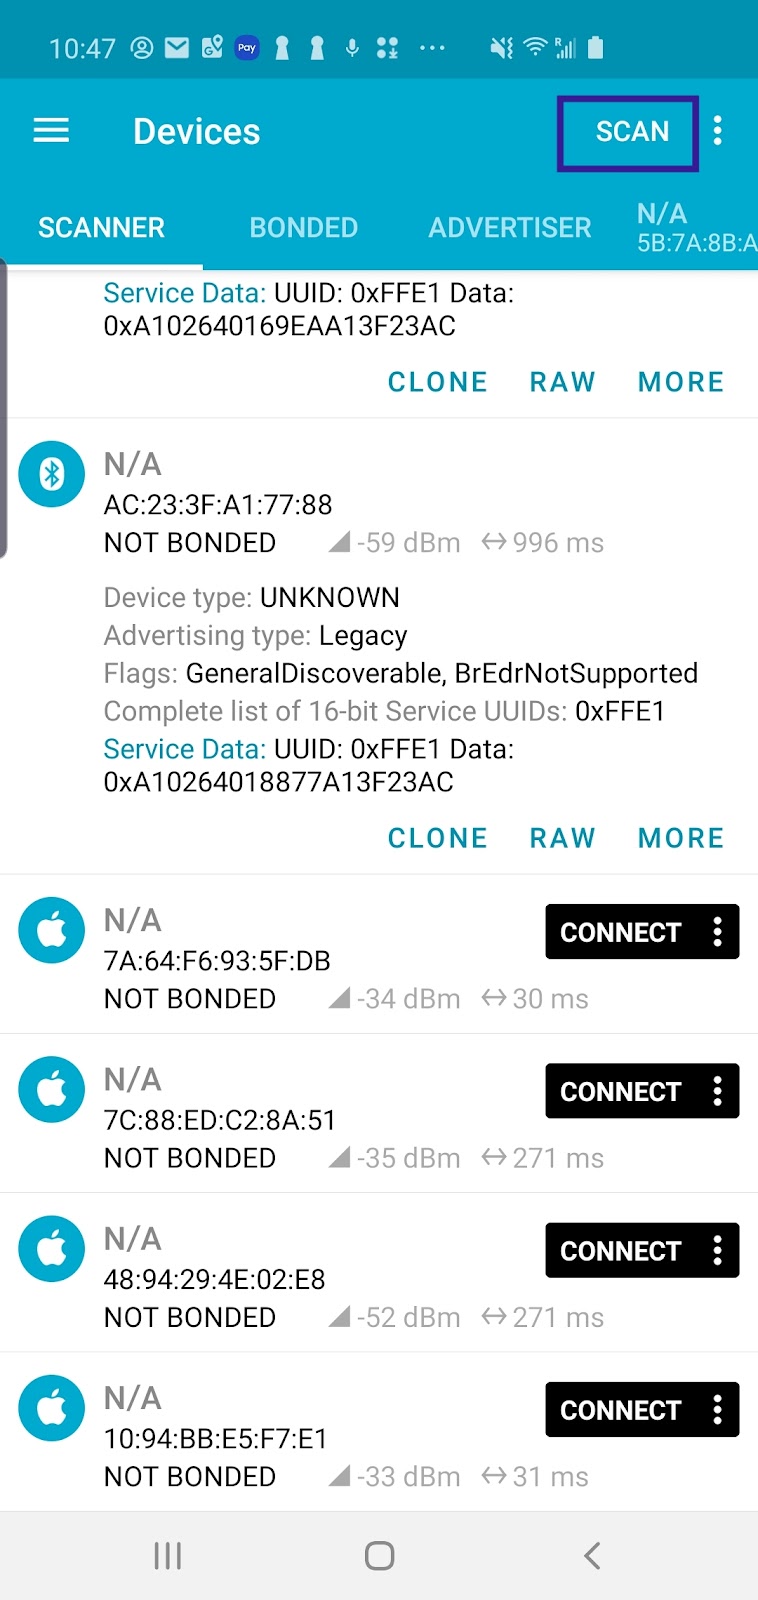
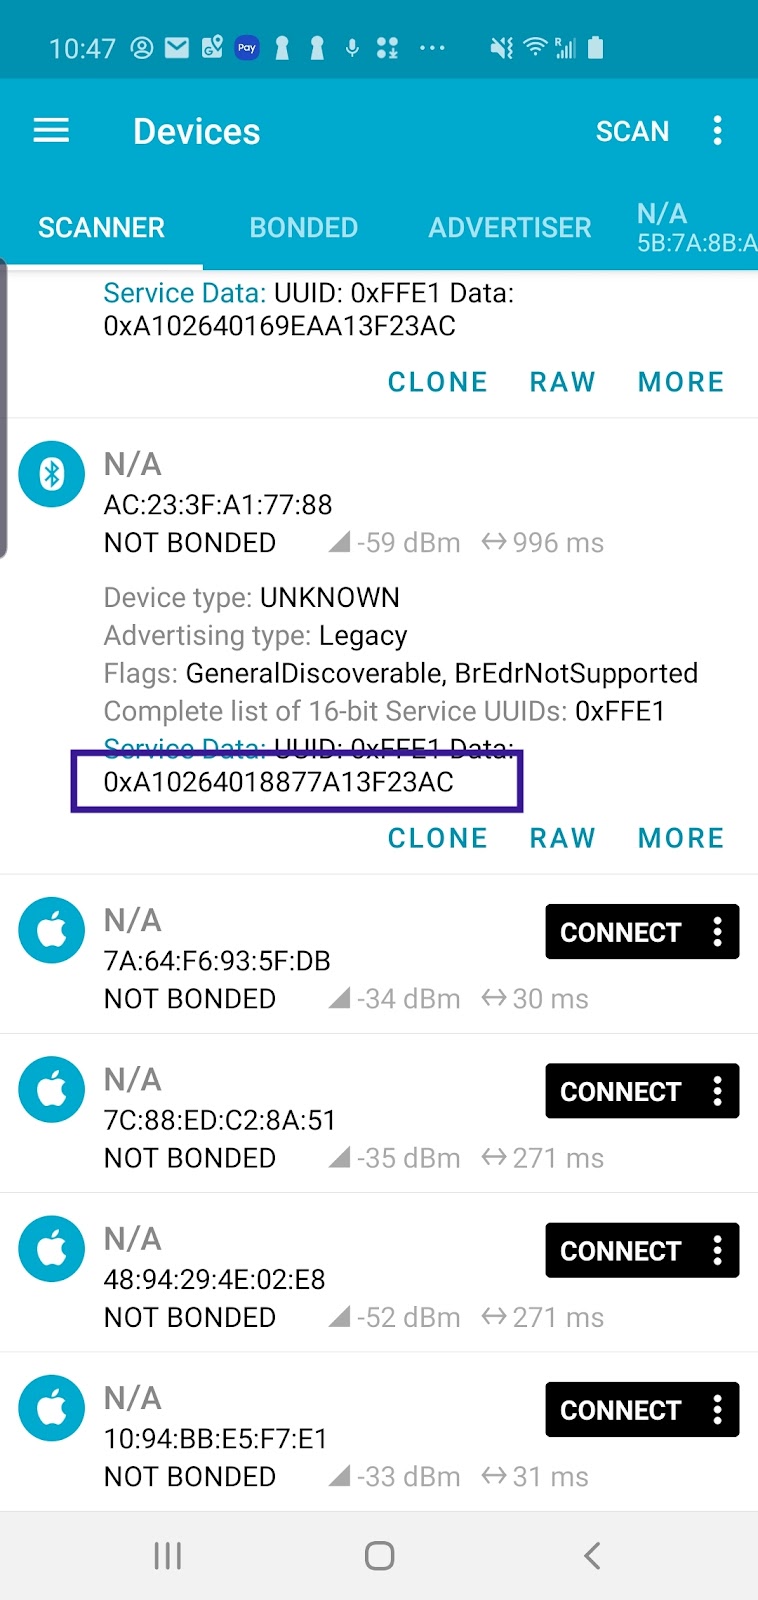
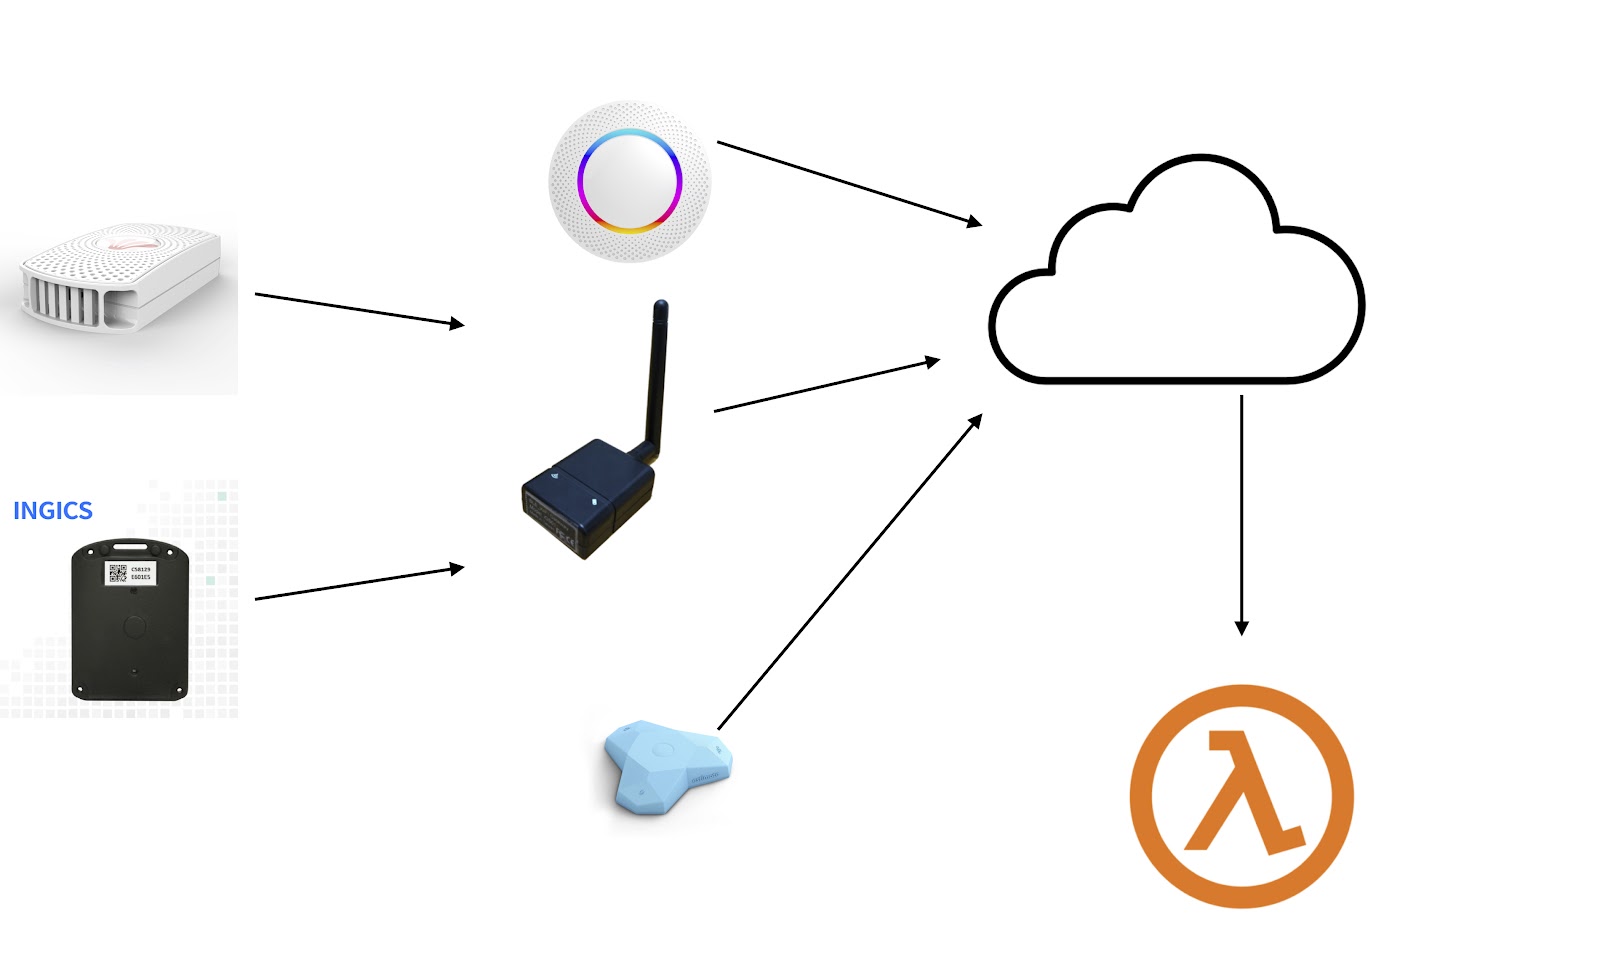
The signals from BLE Beacons can be consumed by two methods, using a Gateway, or using a Phone or Tablet with an application.

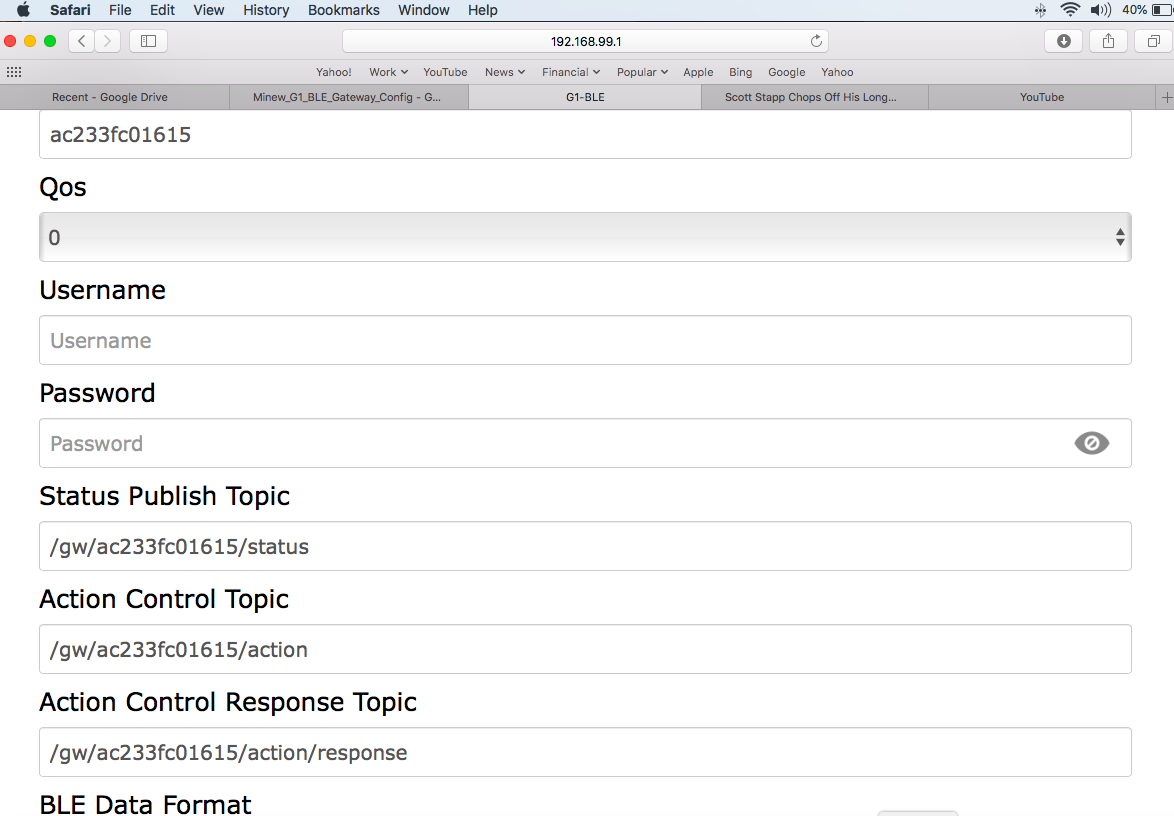
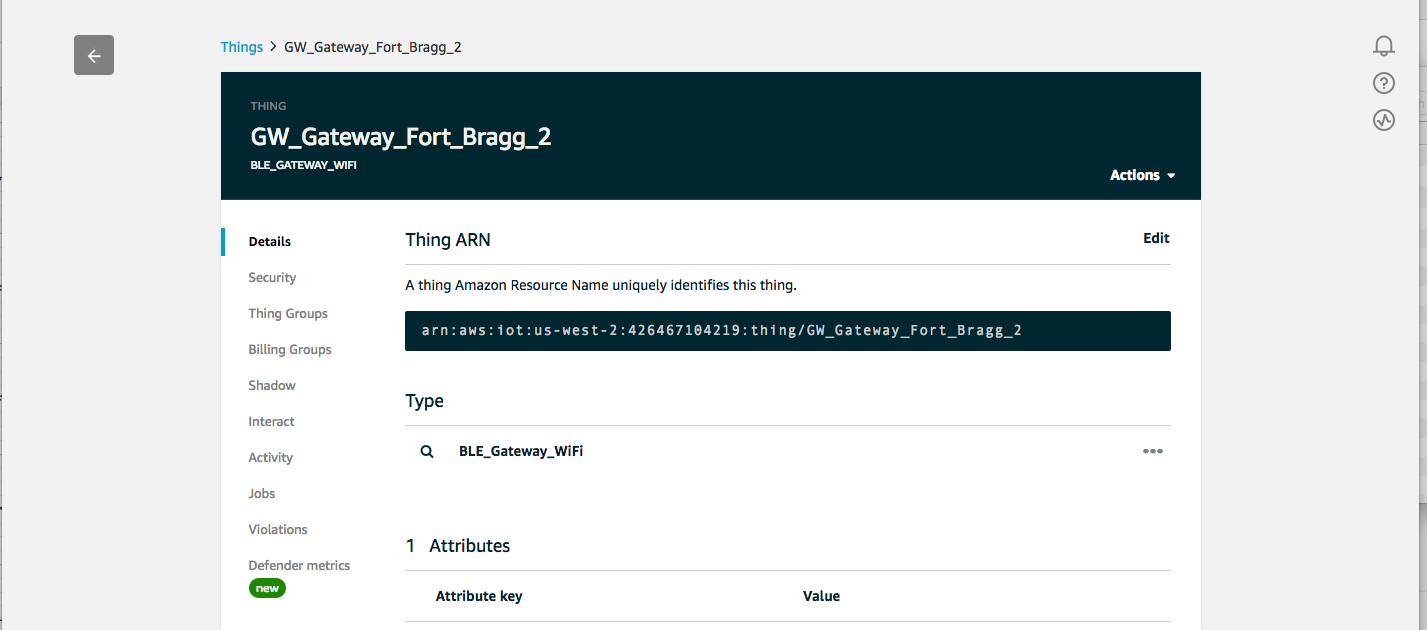
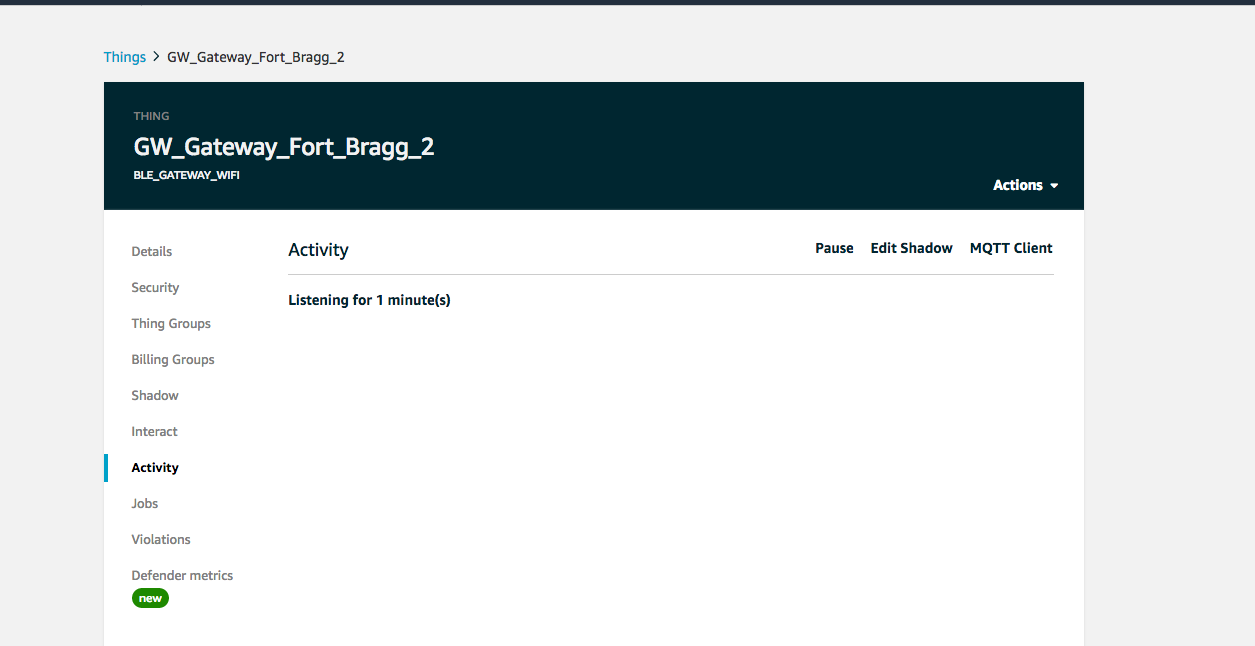
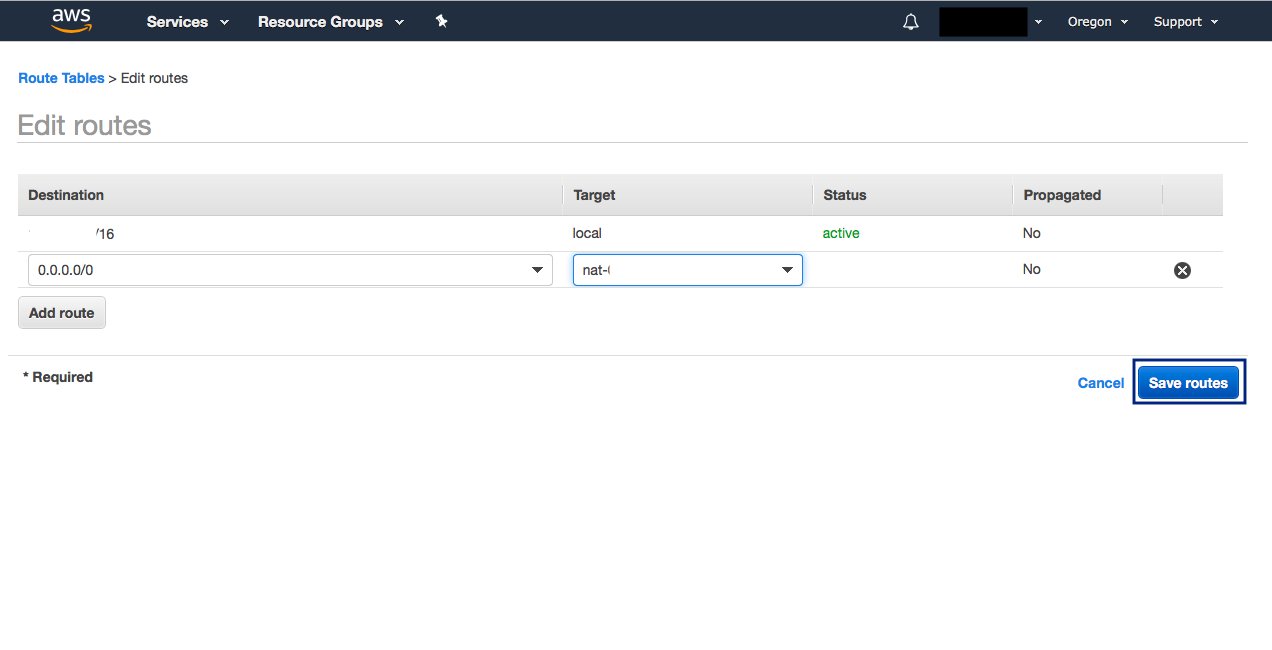
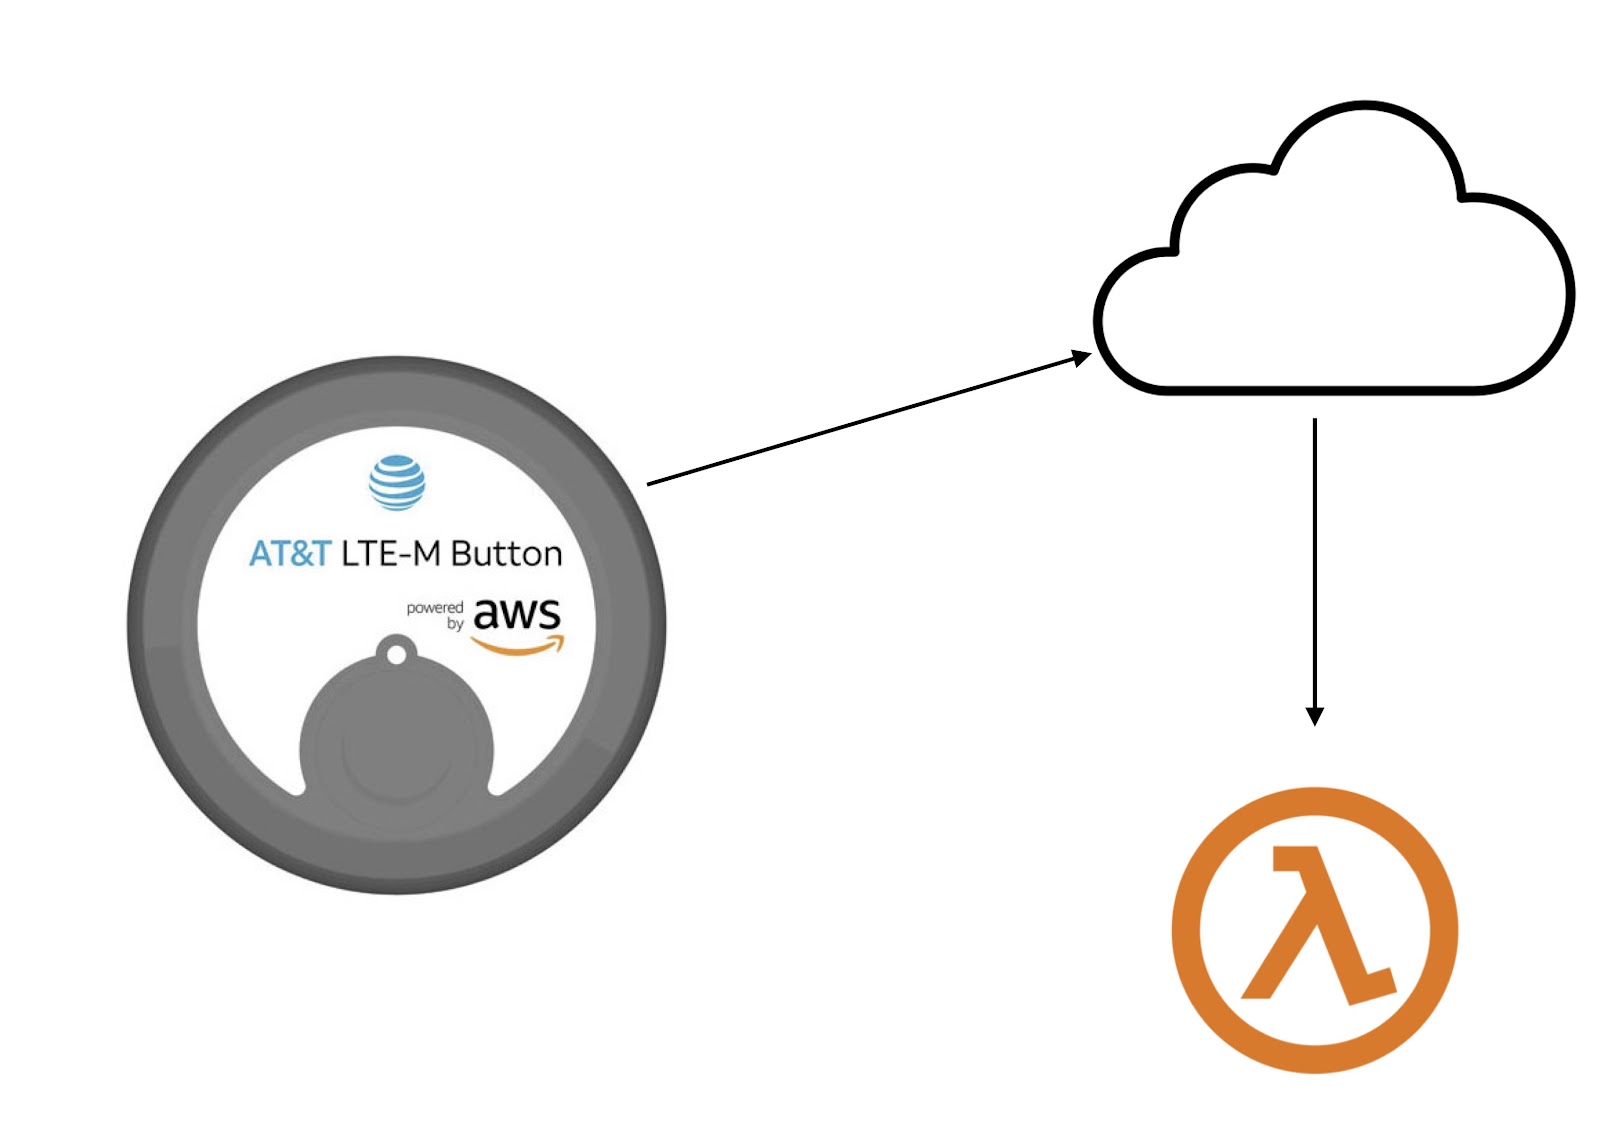
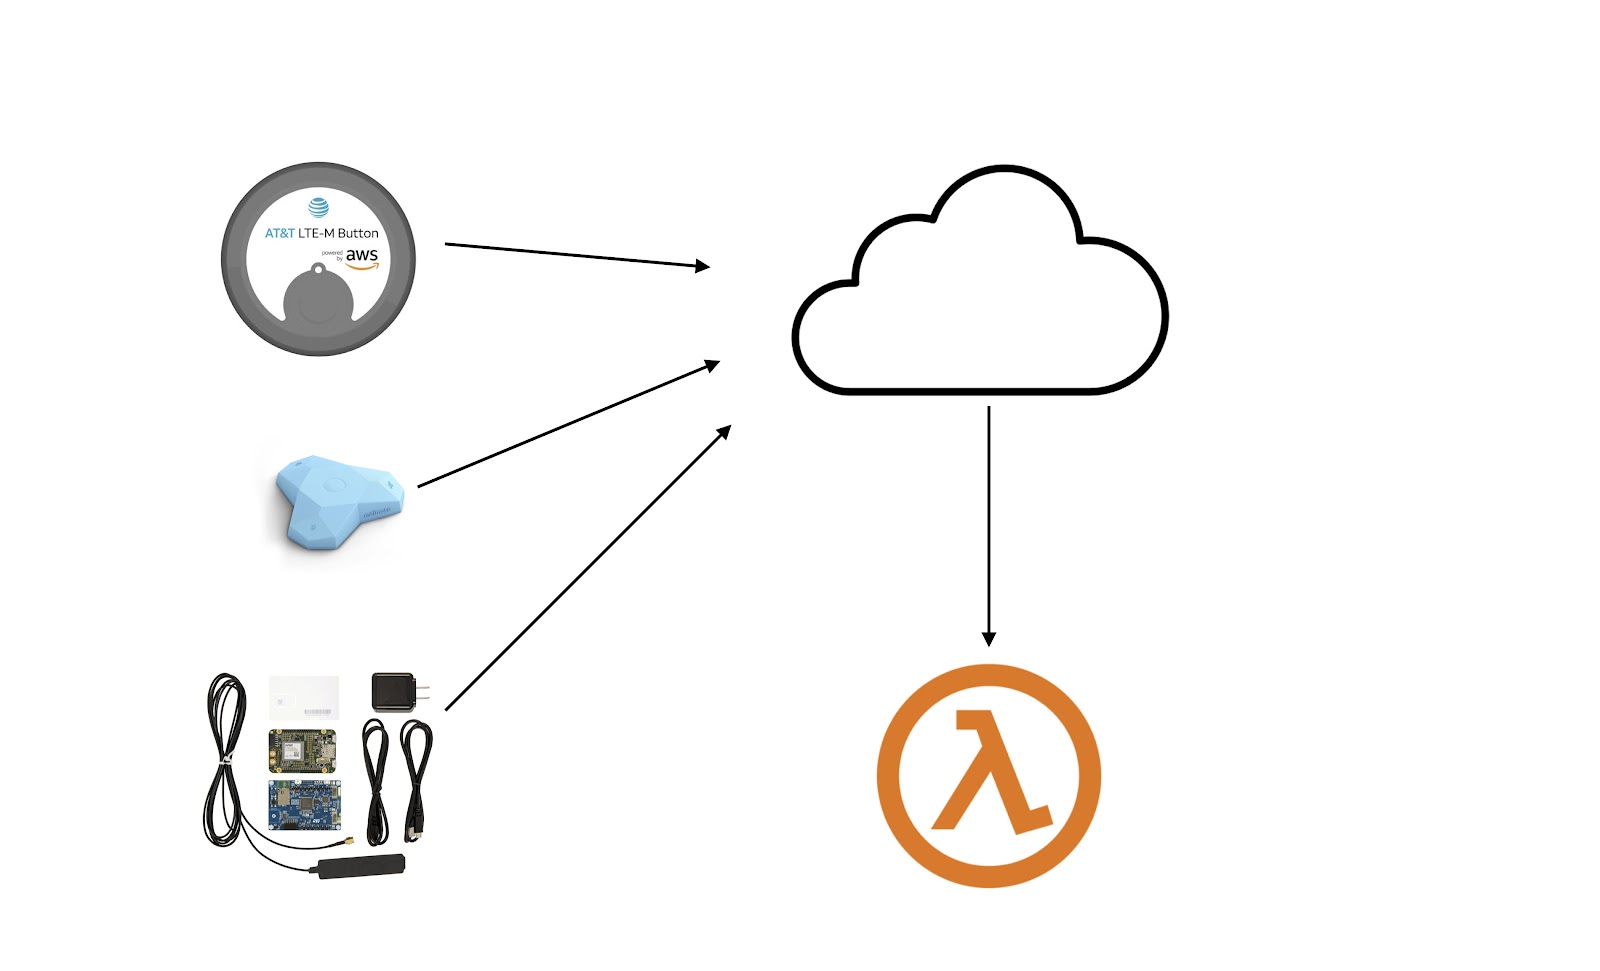
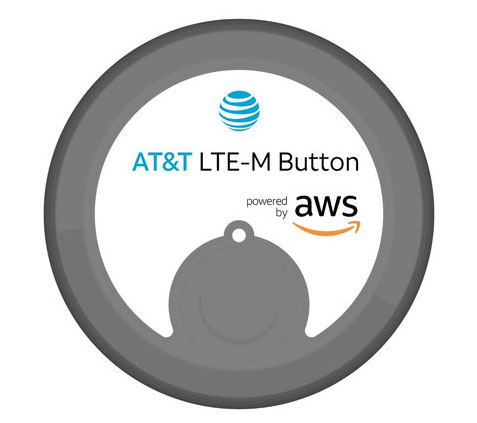
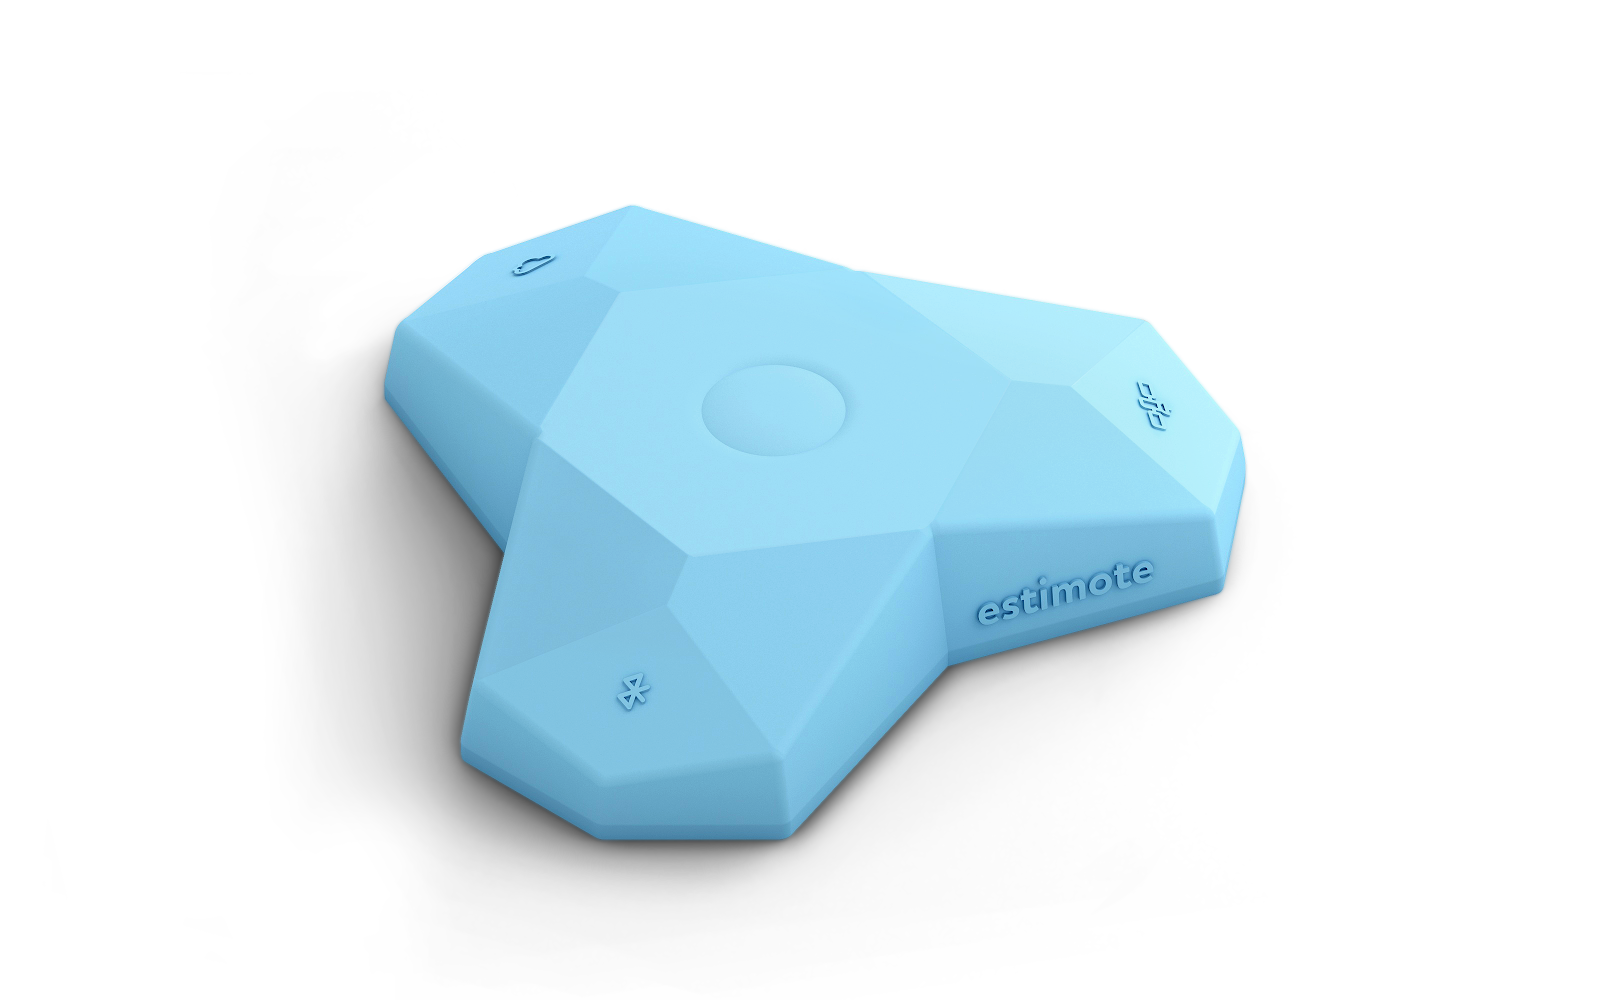
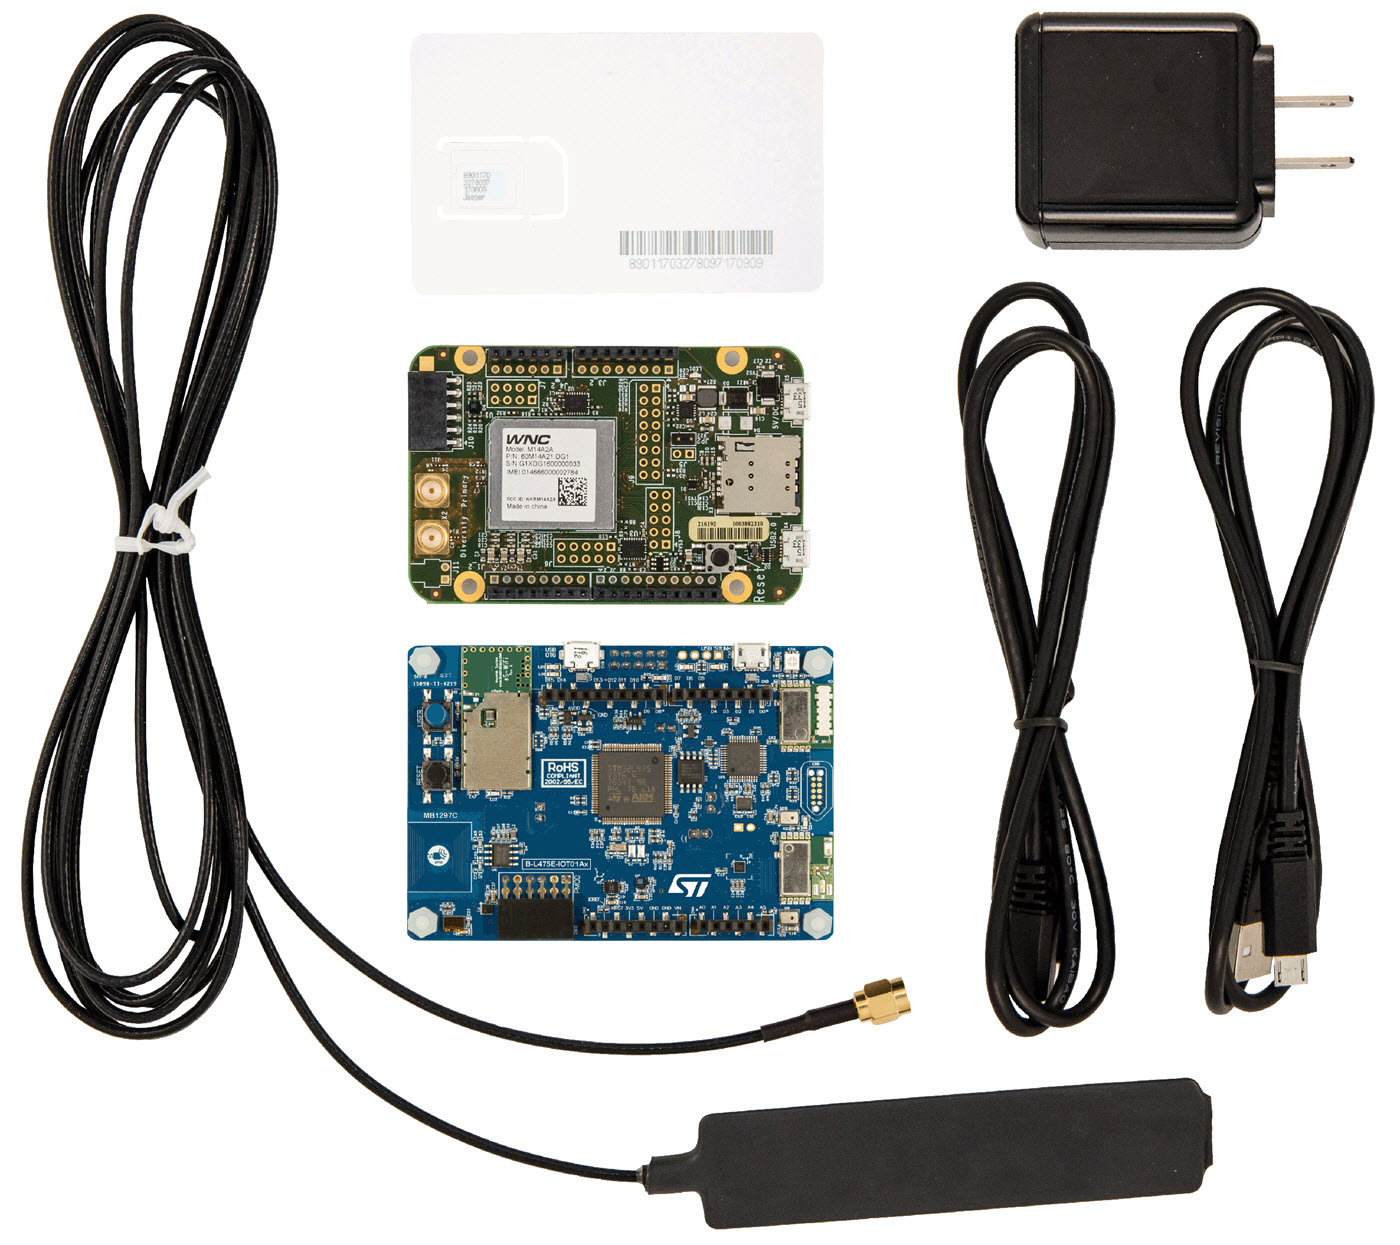
Collecting Data With a Gateway

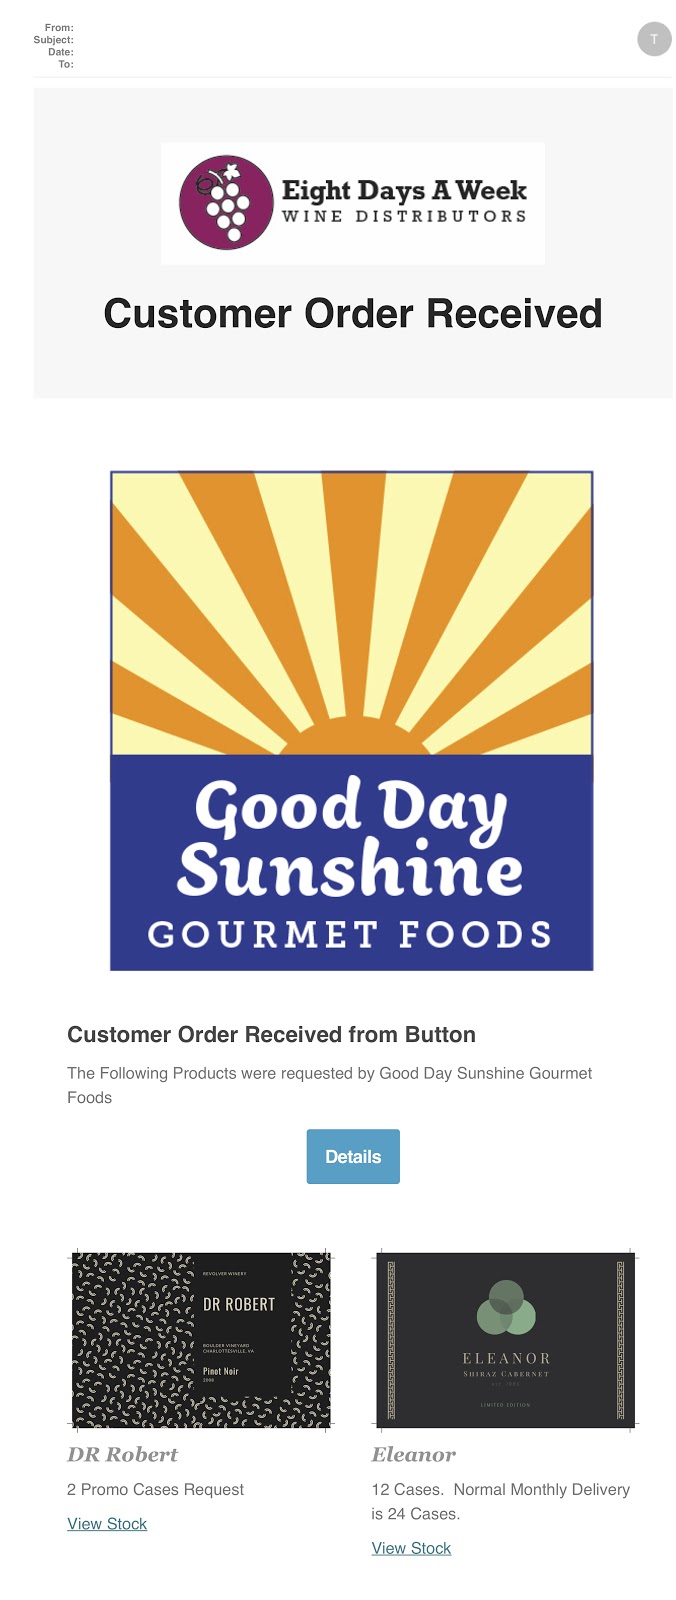
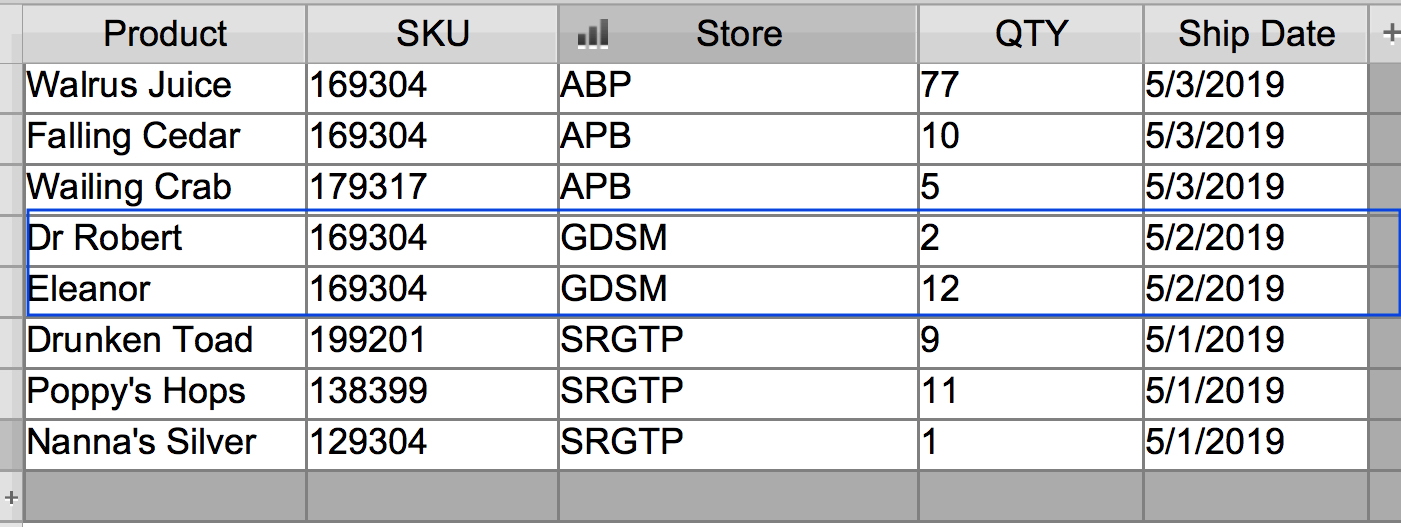
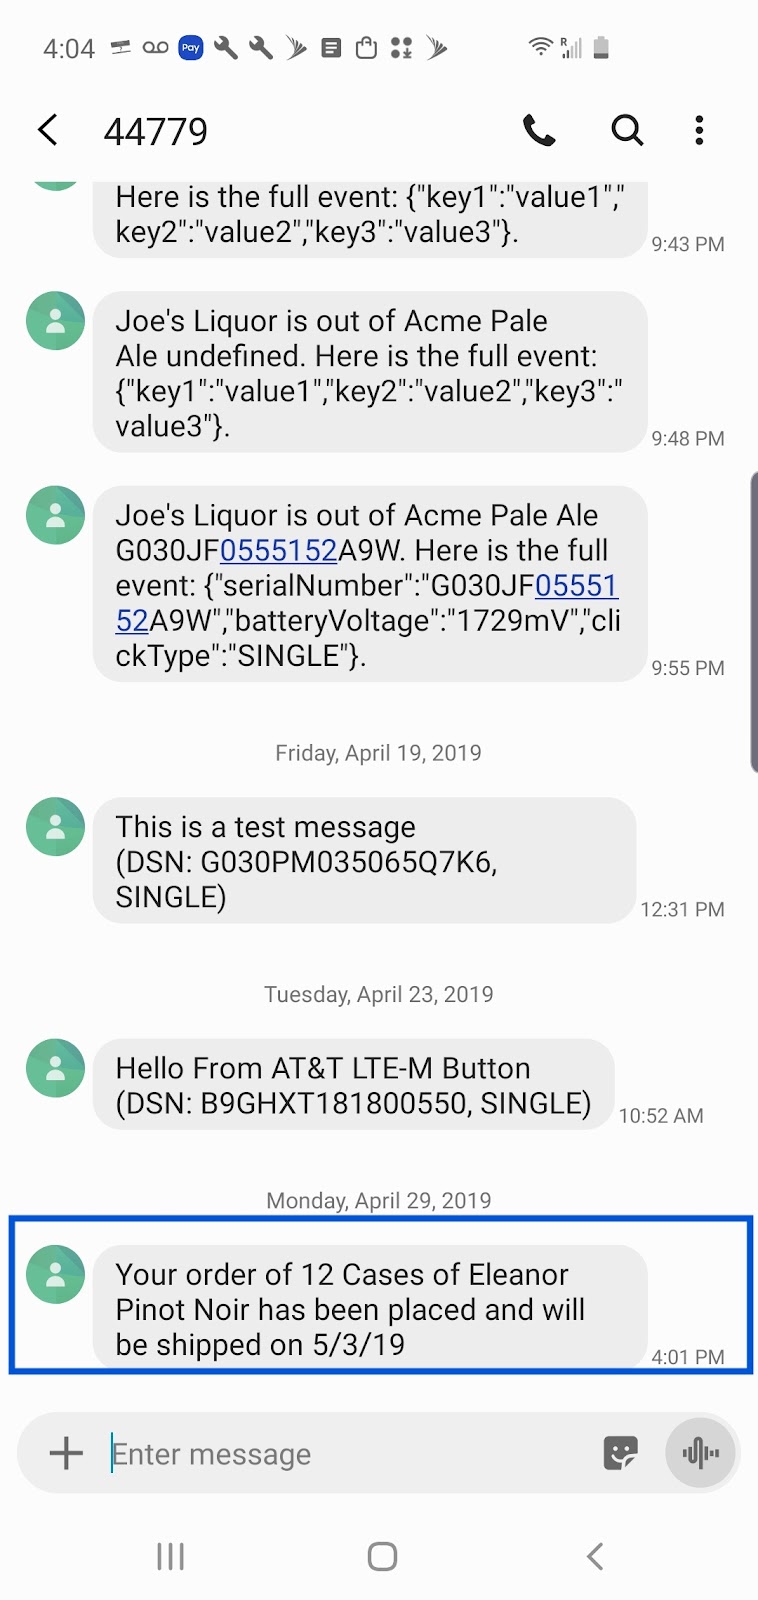
A BLE gateway gathers beacon’s signals and forwards them to a “core” in a cloud service. These gateways can use Wi Fi, LTM-M or NB-IOT (protocols for sending data about things via cellular services), and good old fashioned ethernet.  A serverless application spins up and parses those signals into the appropriate fields in a database. This is great for gathering information from a location and monitoring it over time. Retailers can see areas where shoppers linger using something like INGICs Human Detection Sensor.  Serverless applications can alert workers if assets move or thresholds are exceeded for temperature, humidity, ambient light and so on.

Collecting and Using Data with an Application on a Phone or Tablet

Applications on iOS or Android devices can consume the signals from BLE beacons. These applications can help users navigate, even without an internet connection. They can also be used to gather information associated with the BLE beacon such as offers for shoppers, information about an asset attached to the beacon, or information from any of the sensors connected to the beacon such as temperature, humidity, motion and more.  When the user is online, information about the beacons can be updated in your application from a hosted database.

Summing Up

While Google may have pulled the plug on it’s BLE ecosystem, BLE beacons aren’t going anywhere.  They will continue to be used in applications outside of advertising such as asset tracking, environment monitoring, offline navigation, and retailing applications.

Are you considering using BLE beacons in your business or workplace?  Have you already deployed a beacon solution on Google’s platform and need help moving to something else? Revolution11 has the expertise to create a full ecosystem using beacons – contact us to learn how.

Beacons Are Dead, Long Live Beacons!

Minew Ambient Light Configuration

Important!
Set up your Minew G1 BLE Gateway before attempting to set up the sensor(s).

Updating the Gateway Settings

 Log onto your gateway:

  1. Go to the service tab, scroll down and change the “Whether to Upload Unknown” choice to yes.

2. Click on Apply.

Determining the Payload Data for the Device

1. Download the Nordic nRF Connect App from Apple’s App Store or Google’s Playstore.

2.  Find your MAC Address on the device(s).

3.  Open the nRF Connect App and Press the Scan Button in the upper right hand corner.

4.  Find your Device on the list and make a note of the Bluetooth Payload for the device.

Checking MQTT Publishing at AWS for the Payload

  1. On the Service Tab of the Gateway Admin tool you will see the default topic the gateway is publishing to. Copy the topic.

2. Log back on to AWS, choose the IoT Service, choose Manage/Things and select the Gateway.

3.  Choose Activity.

3.  Click on MQTT Client, paste the default topic into first text box and press “Subscribe to Topic”.

4.  You should see quite a few more JSON Messages popping up, especially if you have a variety of Bluetooth devices. Click on the export button to find your device and examine the data for it.

5.  On the popup that appears, click Download.

6.  On the next popup, choose, save file and then press OK. Press the Done button on the first popup.

7.  Open the file in a text editor such as BBEdit and look for your device. You should now see the device in the payload being delivered to the gateway.

8.  You use the first bit to determine if the sensor detects light or movement (1 or 0) for the E6 Sensor, and the payload for the S2 Sensor broadcasts lux levels and the x,y, and x axis.

Congratulations, you have successfully configured your Minew Ambient Light Sensor.  You can use this sensor to control lighting, monitor lighting conditions over time, get alerts when the lights are turned on or off (or reach various thresholds), or get alerts when something attached to the sensor moves.

Contact Revolution11 to discuss how we can help your organization improve security  or keep track of your business assets with these sensors.

Minew Ambient Light Configuration

INGICS IBS01 Tag Beacon Setup

Important!
You are going to want to setup your INGICS BLE Gateway before using this beacon.  This is not an iBeacon or an Eddystone Beacon.

Beacon Setup

Once you receive your beacon follow these steps to configure:

  1. Install 2 CR2032 3V Coin Cell Batteries. Be sure to align the positive (+) marker on the batteries with the positive + indicator on the battery holder 

2.  Download the iBS01 Beacon Tag Util from the Google Play Store (Android Only).

3.  Activate the beacon by sliding the white button on the top of the beacon.

4.  Open the iBS01 Tag Util and press the “Start Scan” button. Make note of the last string of the iBS01 beacon that shows up in the list. This is the identifier of the beacon that you will see in the MQTT Message Reported by the IGICS Gateway.

5.  The only thing that is configurable via the Android App for the Tag Beacon are the Tx Power (Strength of the BLE Radio Signal) and the ADV Interval (The interval in milliseconds that the BLE Radio Signal will broadcast at). You will tweak these settings, along with the RSSI (Received Signal Strength Indicator) setting on the gateway in order to ensure the gateway is picking up the BLE Radio Signals from the Tag Beacon. (More on tweaking RSSI and other advanced gateway settings will be in a separate blog).

6.  As noted at the start of the blog, these tags do not broadcast using the Eddystone or iBeacon standards; they use a proprietary standard, which broadcasts a single string, or payload, that represents the Tag beacon (it’s identity) and it’s state (if the alarm button has been pressed on the beacon). You can find this payload format here. For instance, for the payload:

02010612FF590080BC4D0100FFFFFFFFFFFFFFFFFFFF

The double 00 Before the F’s in the diagram above would indicate that the button has not been pressed. If the button was pressed the payload would look like this:

02010612FF590080BC4D0101FFFFFFFFFFFFFFFFFFFF

The 1 before the F’s let’s you know that the alarm button was pressed.

In future blogs we will demonstrate how to bring these payload messages that are sent by the gateway into your existing environment so you can both monitor and take action on the data provided by these beacons.

INGICS IBS01 Tag Beacon Setup

Configuring the Root User for Multi-Factor Authentication (Google Cloud)

Important!

  1. Set up a Google Cloud Account for a Root User
  2. Set up an Organization and a Developer Account
  3. Have an SMS Capable Cell Phone On Hand

What is Multi-Factor Authentication (MFA)?

Multi-Factor Authentication is a system requirement that utilizes two or more methods of identification to authenticate a user.

For the Root User one method of authentication is already set up by using the combination of  email and password to log on.

We will be using SMS as our second method of authentication.

Configuring the Root User For MFA

  1.  Go to any google app or google.com and log on with the root user account. Once you are logged on click on the icon in the upper right and choose manage account.

2.  Choose Security from the menu bar to the left. In the middle of the screen under Signing in to Google click “off” next to 2-step verification.

3.  On the next screen press get started in the lower right hand corner.

4.  You will be asked to sign in again, enter the root users credentials and press the next button.

5.  We are using SMS as our second Authentication method. Enter your cell phone number, remember to start with the country code, and press next.

6.  Google will send you a code to make sure it works. Check your SMS messages and enter the Code here and press next.

7.  Once the code is confirmed, confirm you want to turn on 2-factor authentication by pressing the Turn On button in the lower right.

Congratulations! You have successfully configured and tested your root user Google Cloud Account for MFA.

In this day and age of increased security threats it is best to be prepared before disaster strikes! For additional information on increased security methods, contact Revolution11 to schedule a consultation today. Learn what systems we have put in place for businesses of every size.

Configuring the Root User for Multi-Factor Authentication (Google Cloud)

Adding Beacons to Google’s Beacon Dashboard with the Proximity API

Before Starting

Make sure you have configured your beacon using the Eddystone Protocol, with a Namespace and an Instance. You can learn about naming beacons in the blog here: https://revolution11blog.com/2019/05/01/beacon-naming-standards/

Your beacon manufacturer should have provided instructions about setting up your beacon.  Here are some sample instructions we have written about configuring Minew Beacons: https://revolution11blog.com/2019/04/30/basic-configuration-of-minew-beacons/

You will also want to make sure and get the Latitude and Longitude of the location where you will be placing the beacon.

Determining Your Latitude and Longitude

Open up Google maps and find your current location. Right click on the location on the map and choose “What’s Here?” You will get a popup containing the latitude and longitude, go ahead and make note of them.

Determine the PlaceID

Google’s PlaceID is used with the Places API. 

Go to https://developers.google.com/places/place-id and find your location. Make note of the PlaceID.

Enabling the Proximity API

  1.  Go to https://console.developers.google.com/apis/library/proximitybeacon.googleapis.com and log in as the root user.
  2. Select the Project you would like to use with the Proximity API.
  3. Press “Enable”.

Create Credentials

  1.  Once the API Setup is complete you will land on the Manage API page. You’ll see we need to create credentials.  Click on credentials in the bar to the left.

2.  On the credentials home page, we’ll start by configuring the consent screen that pops up when this API is called. Press the Configure Consent Screen button.

3.  We’re going to do a minimum configuration to get us going. We’ll name our app Beacon App and upload an icon for it to use for the application logo.

4.  Scroll down and press “Save”.

5.  On the next screen click on create credentials and choose OAuth client ID.

6.  Select Web Application and press “Create”.

7.  Name the credentials and paste the URL for google’s OAuth Playground (https://developers.google.com/oauthplayground/) in the Authorized redirect URLs field. This allows us to test adding beacons to the beacon dashboard. Press “Create”.

8.  You should get a pop-up with the Client ID and Secret we will be using in the OAuth Playground. Copy the Client ID then click “OK”.

Testing the Proximity API with the OAuth Playground

  1. Open Google’s OAuth Playground in a new browser window with this URL: ​developers.google.com/oauthplayground

2.  Click the gear icon in the top right corner and:
● Change “OAuth flow” to “Client-side”.
● Check the “Use your own OAuth credentials” checkbox.
● Paste the client ID you generated in the previous step, click on close.

3.  Then, on the left side, in the “Input your own scopes” text field, type:

https://www.googleapis.com/auth/userlocation.beacon.registry and press the authorize APIs button.

4.  You will be asked to sign in.

5.  You will be asked to give permission to view and modify the beacons. Click on “Allow.”

6.  You will be asked to confirm your choices. Press “Allow.” 

Creating an AdvertisingID

  1.  Now we need to create an AdvertisingID to use with the Proximity API. This is made with a packing function using the Namespace and Instance that the beacon is using.  There are a lot of ways to do this within an app, but since we are in the Google OAuth playground, and we are working with a Mac, we are going to do this really quickly in ruby with the terminal app. Open the terminal app from apps/utilities and fire up the ruby application by typing irb and then hit return.

2.  Type in the following using your Namespace and Instance in the terminal and hit return.

require ‘base64’
namespace = ‘YourNameSpaceHere’
instance = ‘YourInstanceHere
puts Base64.strict_encode64([namespace + instance].pack(‘H*’))

This will generate the AdvertisingID as shown below:

Registering the Beacon

  1. Now return to the OAuth playground.

2.  Below is an example you can paste in, replace the example data with your own.

  • The advertisingID you generated in the terminal
  • The place ID you copied earlier
  • The latitude and longitude you collected earlier
  • The Places API supports floors for indoor mapping so we are going to set the name of the indoor level to 1 in our example
  • You can add a description of the beacon here
  • And in the properties, you can add any key value pairs you wish, we are starting with the key of position and the value of entryway.

Once the request URI text is entered press “Close”

3.  Hit “Send the Request”.

4.  You should see a successful post message.

View the Beacon on Google’s Beacon Dashboard

  1.  Go to https://developers.google.com/beacons/dashboard/  Since this is the first time you have used the beacon dashboard, you will get a pop-up message. Press “Start”.

2.  Another pop-up will appear asking for permission to use your account, click on “Allow”.

3.  Choose the project you are using with the Proximity API.

4.  You should land on summary page of the beacons connected to that project.  Congratulations, you have successfully setup the proximity API! The developer you set up in the last blog should now be able to work with the API.

Adding Beacons to Google’s Beacon Dashboard with the Proximity API

Setting Up an Organization & Creating a Developer Account

Important Note Before Starting:
• Make sure your organization has a Domain
• Make sure that you have access to your Domain’s Control Panel

This is a process that generally will take place over the course of two days. Setting up an Organization requires Google to verify your ownership of the domain, a process that you will want to leave several hours for, or have going overnight.

Creating the Organization

  1. Make sure you are signed onto the Google Cloud console. Click on “Identity & Organization” in the left menu bar. You will receive a pop-up giving you an overview of the identity setup process, review, then press “Sign Up”.

2.  The next screen tells you a little about the cloud identity service, click “Next”.

3.  The next screen asks for your business name and size, fill those in and press the “Next” button.

4.  You will be asked where your business is located, pick a location from the dropdown and press “Next”.

5.  Enter Your email address and press “Next”.

6.  You will be asked for your business’s domain name, enter it and press “Next”.

7.  You will be asked to confirm the domain you are using to set up with Google cloud. Hit “Next”.

8.  You’ll be asked for your first and last name, enter them and press “Next”.

9.  Provide the email address and password you will be using to manage identities and press “Next”.

10.  On the next screen, select “I’m not a robot.”

11.  A verification screen will popup. Select the correct images that match the word or phrase in the top of the pop-up and click “Verify”.

12.  When the pop-up closes press on the “Agree and Create Account” button.

13.  You should see the screen below when your account has been successfully created. Press “Go To Setup”.

Verifying Domain Ownership

1. The next step is to verify your domain ownership. You’ll want to be logged into the control panel of your domain in another tab or window. Press “Start”.

2. We are already logged into our domain’s host website, so we are going click Yes in the first checkbox.

3. You will be asked to open the control panel on the website where you manage your domain. We have already done so, click on the checkbox “I have opened the Control Panel for my Domain”.

4.  On the next screen you will see two pieces of information we will need to add our domain.  The name (also known as the host or alias) and the value (also known as the answer or destination).

5.  Go to your domain panel and find the area where you add new DNS records. The interface for doing so will vary depending on the website where you manage your domain. Make sure the type of record you are adding is TXT and enter the two values provided by Google, the host record and the TXT Value. In this case we are going to press the “add record” for this service provider’s control panel.

6.  You should receive a confirmation.

7.  Return to the cloud setup pop-up, and click on “I added the TXT Verification record.”  We also saved the record, so click on the “I saved the TXT verification record” checkbox as well.

8.  Press the “Verify Domain” button.

9.  You should see a screen like this while your domain is verifying:

10.  And more likely than not, you will see a message like this after about an hour. It usually takes more than an hour for the change you made at the website where your domain is managed to propagate across the internet. Come back in a few hours or the next day and hit the retry button.

11.  You will see the same set of checkboxes that you saw before. We have already completed this so click on “Verify Domain.”

12.  You should see a screen like this once you have verified the domain. OK, let’s now set up our developer. Press the “Create Users.” 

Creating a Developer Account

1. On the create user pop-up, give the user a first name, last name and a user name. Press “Add”.

2. On the next screen enter the email address for notifying the developer of the account.

3. Scroll down, type in a message for the developer and press “Send Emails.”

4.  That’s it for adding an account. Now let’s create a project for our developer to use.  Press “Continue to Cloud Console.” 

Adding a Project

1. Agree to the terms of service by checking the box, then press “Agree and Continue.”

2. You’ll land back on the IAM & Admin homescreen. There are a few more things we should set up, like billing accounts and other roles, but we’ll tackle that later on. Let’s create our project. Click on “Google Cloud Platform” in the upper left — this is how you navigate to the homescreen of Google Cloud.

3. You’ll see that the homepage is not viewable for organizations; you will need to select or create a project in order to view the console homepage. In our case, we don’t have any projects, so we will press the Create button.

4. Give the project a name, and press “Create.”

5. Once your project is created, you will land on the project home page. Let’s now give our developer access to this project.

Project Access

  1.  If the navigation bar to the left is not exposed click on the icon in the upper left hand corner to expose it and choose IAM & Admin.

2. On the top of the IAM screen, click “Add.”

3.  We will be using the Proximity API for our project, so we will give our developer BeaconEditor rights.

4.  Type in the developer account we will use and click on the roles dropdown, find the Proximity Beacon Set of roles and choose it. Pick “Beacon Editor”.

5.  Press “Save.”

6.  You should see that the developer was added to the project.

Checking Developer Access

  1.  Now, let’s make sure the developer can log onto the project. They should have reeived an email that looks like the one below. Have the developer click on the “Sign In” link in the email.

2. When the developer signs in, they will be asked for the temporary password that was provided in the email. Enter it and press “Next.”

3. The developer will be asked to accept the terms of service for the account. Press “Accept.”

4. The developer will be asked to create a new password, and then confirm it. Then press “Change Password.”

5.  The developer will be asked to agree to the terms of service for Google Cloud Platform and it’s APIs. Click on the corresponding checkbox, and press “Agree and Continue.”

6.  From the developer’s home screen the project can be selected at the top of the screen. This will bring up a pop-up of project, have the developer click on the BeaconProject.

7.  This will bring the developer to the project homepage. We’ll explore setting up the proximity API and working with it in the next blog in this series.

Setting Up an Organization & Creating a Developer Account

Setting Up A Google Cloud Account

Before you set up your Google Cloud Account you will need:

  1. A Google Account, which will be the owner of the account.
  2. A credit card. Google gives you a $300 credit you can use for the first year. 

Go to https://cloud.google.com and press the “Get Started For Free” button in the upper right corner.

You will be asked to sign in with your Google account. Sign in then press “Next”.

Enter your password and click “Next”.

Fill in the account recovery details on the next screen, review and press “Done”.

Agree to the various terms of service by clicking the checkboxes and press “Agree and Continue”. 

Confirm or add your address and add your credit card information on the next screen and press “Start My Free Trial”. 

You should now see a success message and now you are ready to work with Google Cloud!

Be sure to check out the next blog in this series “Setting Up an Organization & Creating a Developer Account”.

Setting Up A Google Cloud Account

Setting Up A MySQL Database on Bluehost

Why MySQL for IoT Data?

MySQL is one of the most used databases on the web. Many organizations have pre-existing resources, such as shopping carts and order tables, which already exist in MySQL Databases. 

In this blog you will learn how to set up a MySQL database to accept input from a serverless function so clicks are captured from IoT buttons. These IoT buttons can be configured in countless ways and perform actions like re-ordering physical stock or sending notifications. Check out our IoT Button Roundup Blog for some ideas on how these buttons can make your life a little easier!

Creating the Database
1. Sign on to your Bluehost* account and click on the advanced tab, then click on MySQL Databases.
*Wordpress sites on top of a MySQL Database, so if you have a WordPress site, or external web hosting, you probably  have access to a MySQL database. The screen example below may vary for different hosting providers.

2.  Under the create new Database Heading, type in the name of the database and then click on the Create Database.

3.  You should get a success message, then click on the Go Back link.

4.  This will take us back to the databases homepage, scroll down and you will see the new database has been added to the list.

5.  Scroll down to create a user for this database. Type in a username, a password, and confirm the password. Then click on the Create User.

6.  You will receive a success message, then click on Go Back.

7.  Now we are going to add this user to our database. Scroll down and under “Add User to Database” select the user you just created, and then select the database and click Add.

8.  Select All Privileges to make this a full access user.

9.  Next we are going to make a user just for our IoT button. Scroll down to Add New User, enter a username, a password and confirm the password, and then click on create user. Add this user to the database just like you did the full access user.

10.  We don’t need to give our IoT button user full access, so just use the permissions here. Click on Make Changes and then Go Back.

11.  Make note of you both your full access and button user’s name and password as well as the name of the database as you will need these later. You will also need the name of the database host. To find this, click on Domains in the menu bar to the left.

12.  Before we  can work with our database on our local computer, we need to record our computer’s IP address in a table on the service provider’s site so that we can access the MySQL Database. First let’s get our IP address. Simply go to Google and type in “What’s my IP?”

13.  Next you will add your IP address to the white list on Bluehost so you can work with the database from your computer. Click on Advanced on the menu bar to the left and choose Remote MySQL.

14.  Add the IP address to the host field —  it’s a good idea to add the name of your computer or service in the comment field. Click on Add Host.

Working with the Database
1.  For this example we will be using DBeaver, a cross platform application that works with most SQL databases via SQL Statements, or a GUI interface. You can download the application from https://dbeaver.io.

2.  Once the app is installed, open it and you will be prompted to select a database, choose MySQL.

3.  Enter the following details necessary to connect to the hosted MySQL Database. 

Hostname – yourhostname.com

  • Port – 3306
  • Database – yourdatabasename
  • Username – fullaccessuser
  • Password – fullaccesspassword

Press the Test Connection button

4.  Since we have not connected to a MySQL database yet, we will be prompted to download a driver for the database, click on the download button in the lower left hand corner.

5.  Press the Test Connection button again, and you should be able to successfully connect to your database.

6.  A popup will appear asking if you want to create a sample database. Since we have already created a database, click No.

7.  A ‘Tip of the day’ will show up every time you start the app unless you deselect the “Show tips on startup” checkbox. Close the window to start working with your database.

8.  Click on the connection to your hosted MySQL Instance in the panel to the left and open up the disclosure triangle so we can see the MySQL Directory.

9.  Open up the disclosure triangle for the databases and you will see the database we created earlier.

10.  Next we will create the table and columns needed to capture data from an IoT Button. Select the database, Right Click, select create and then choose Table.

11.  Click on the Properties Tab and name the table.

12.  Now let’s create the columns. Select the database, Right Click, select create and then Column.

13.  The Properties popup will first appear. Name the column  ID, and give it a data type of INT, it will not be null and will auto increment. Press OK.

14.  Right Click to create another column, we are naming this one buttonJSON, with a data type of TEXT.  Click OK.

15.  Next we will create the Primary Key. Right Click on Constraints and choose Create Constraint.

16.  Click on the checkbox next to “id” and press OK.  Choose save from the file menu, or Command S to save the changes to your database.

17.   You should get a confirmation popup, click on Persist to make these changes in the hosted database.

18.  If you get an error message, you may have disconnected from the database while setting up these changes. Right Click on the MySQL Instance and choose Invalidate/Reconnect to establish a new connection and try saving the changes again.

Allow Access For Serverless Apps IP

The last step in getting IoT data into our MySQL Database is to allow the IP address of the serverless app sending the button data access to the database at your service provider.  For Bluehost, click on advanced in the menu bar and choose Remote MySQL and add the IP address for the serverless app just like you added the IP address for your computer.  


Check out the Revolution11 blog on configuring your AWS Virtual Private Cloud (VPC), so that your serverless app has an IP address.

Congratulations, you you are now ready to use your server less app with a hosted MySQL Database!

Setting Up A MySQL Database on Bluehost

Configuring a Virtual Private Cloud (VPC)

What You Will Learn in This Blog
Configure your Amazon Web Services (AWS) Virtual Private Cloud (VPC) so the serverless apps you are running within your VPC have a public IP address. This  means you can use your serverless apps with external SQL Databases.

What is a Virtual Private Cloud?
A space where Amazon resources such as databases, serverless applications, storage, and other useful tools reside as a part of a virtual network. 

What are Subnets?
Subnets are segments of a network, broken down by IP address ranges. Various AWS resources are assigned to the IP addresses within the ranges.

What are Route Tables?
Route tables are  a set of rules that determines how traffic is routed on a network.

What is a Network Address Translation (NAT) Gateway?
A NAT Gateway routes internal traffic to a public IP address. This is important because we want to use the NAT Gateway to associate our serverless functions with a public IP address — we can then use our serverless apps with a MySQL database that is not hosted with AWS.

Configuring Your Subnets
1.  Log into the AWS Console as a Root User and search for the VPC service. 

2.  On the left menu select Subnets.

3.  You will see the list of subnets that are already set up.

4.  It’s important to label the subnets to make them easier to identify as we work with them. Let’s label the subnet where the last two sections are zero as ‘public.’

5.   Locate the Name field and click on the pencil icon to edit the field. Type in ‘public’ and confirm the change by clicking the checkbox in the right corner below the edit box.

6.   The name ‘public’ now appears in the list. Amazon suggests that your Lambdas use two subnets.  Repeat the labeling process for two more of the subnets, changing the name fields to Lambda Private 1 & Lamba Private 2.

7.  Your subnet list should look like this:

Setting Up Route Tables
8.  Next, click on route tables on the left menu.

9.  You will see an existing route table here.

10.   We will now create a couple of new route tables. Click on the Create Route Table in the upper left.

11.  For the first name route table, we are going to use the name Public Subnet, and we are going to select our existing VPC from the dropdown. Press the create button.

12.  You will land on this success screen once the route table is created. Press the close button to return to the list of route tables.

13.  You can see the new Route Table back in our list of route tables.

14.  We are going to repeat this process for our second route table, but we are going to name this one Private Lambda.

Associating Subnets with Route Tables
15. Now we are going to set up the Public Subnet, click on it and then select the subnet associations tab.

16. Press Edit Subnet Associations.

17.  You will see the four subnets we have, this is where those labels come in handy.

18.  We are selecting the public subnet for the public route table. Click on it and press Save.

19.  We are then returned to the route table home, and we can now see the association with our public subnet.

20.  Next, Let’s set up the Private Lambda Route Table, click on that and select the subnet associations tab, then press the Subnet Associations Button.

21.  Amazon recommends two subnets for Lambdas so we are selecting the 2 Lambdas we labeled just for that. Then Press Save the in the lower right hand corner.

22.  You can see that two subnets are now associated with the Private Lambda Route Table when we return to the list of route tables.

Setting Up The Public Route Table
23.  Select the Public Route and press the Edit routes button.

24.  This will bring you to the list of routes. We are going to add a public route. Click on the add route button on the left.

25.  For the destination, we are going to manually add the public route which is represented by 0.0.0.0/0.  For the target we are going to choose our existing internet gateway.

26.  You will get a success message. Press Close.

Setting Up a NAT Gateway
27.  Now we are going to set up a NAT Gateway to provide an external IP address for our Lambda. Click on Nat Gateways on the left menu.

28.  We don’t have any NAT gateways set up yet so we are going to create one. Press the Create NAT Gateway button in the upper left.

29.  For the subnet, pick the public subnet from the list. We are going to create a new elastic IP address by clicking on the Create New EIP Button. Then we are going to press the Create a NAT Gateway button in the lower right hand side of the screen.

30.  You should get this success message, click on the close button in the lower right to return to the list of NAT Gateways.

Associating Private Route Table with the Nat Gateway
31.  We now need to associate our Private Route Table with this NAT Gateway so our Lambdas can use the external IP address we just created. Click on Route Tables on the menu bar to the left.

32.  Select the Private Lambda Route, then press the Routes tab and choose the Edit routes button.

33.  Add the public route destination, 0.0.0.0/0 and then choose the NAT gateway we just created as the target. Press the save route button in the lower right hand corner.

Giving your Lambda Role Permission to Use the VPC
34.  Now we are going to give our Lambda role permission to use this VPC. Return to the console home page and find and click on IAM.

35.  On the IAM Home Screen choose Roles from the menu to the left.

36.  You will land on the Roles home page, scroll down to see the existing roles.

37. Scroll down to the list of existing roles and click on the Lambda you are interested in.

38.  You’ll see our Lambda has basic permissions to execute. We want to let it use VPC, so click on the Attach Policies Button.

39.  Search for VPC and select “AmazaonVPCFullAccess” and press the “Attach Policy” button in the lower right hand side of the Screen.

40.  When we return to this roles’ detail screen we can see the VPC policy is attached.

Configuring Your Lambda to Use the VPC
41.  Go to the AWS consul homepage to edit the Lambda application to use the VPC. For this example, we are using a serverless app that inserts the results of an IoT button click into a SQL database. We are using our default VPC, our 2 private subnets for the Lambda, and the default security settings. Press the save button in the upper right hand corner.

42.  Now test the Lambda, you can see how to set up these test events by watching this video, which covers installation of this serverless app on this channel. Congratulations! Success.

Configuring a Virtual Private Cloud (VPC)

IoT Button Roundup


What is an IoT Button?

An IoT button is a piece of hardware that sends data to the cloud when you press a button; a serverless application then takes an action or series of actions based on the information that is sent when the button is clicked.

What Can I do with an IoT Button?

Your serverless app can run a simple 1-task function, such as:

  • Send an email  
  • Send an SMS  

AWS’s One Click and IoT Button apps make it painless to set up serverless apps that perform seamlessly in the cloud

Create Serverless App Workflows

Your serverless app runs on a series of functions, which creates a workflow  

Common Example Workflow

Imagine that you are a representative for a wine distribution company

One of your customers is running low on stock between your regular visits.

The First Action:

In the stockroom, next to cases of a particular wine, a button tied to the SKU for that wine is positioned on the shelf. When the manager realizes the store is running low on stock, she presses the button – just 1-click!. The wine rep receives an email letting him know that the store is running low on stock for this item.

The rep knows all of the relevant information about the product: the SKU and the typical quantity this customer orders.

The Second Action:

An order is automatically placed in the distributor’s ordering system.

The Third Action:

An SMS is sent back to the customer letting them know the order has been placed and when it will ship.

Create Dynamic Serverless Apps

Using the Twilio API we can ask the customer, via a phone call, how many cases of wine they would like to order.


Demo

What About the Buttons?

Now that we have covered what buttons are and what they can do, let’s review the types of buttons out there.

Wi-Fi Buttons

If you are mainly going to be using your buttons in one place and have a wi-fi network available, the AWS Buttons might be a good bet for you.

AWS IoT Button

Use this button and the AWS ButtonDevApp to develop your serverless apps and test them with the button. You can let your users change the wi-fi Networks the buttons work on with the AWS IoT Button Wi-Fi App.

You can purchase this button from Amazon.

AWS Enterprise Button

Once you have developed and tested your Serverless apps, the AWS Enterprise Button is a great choice. It uses the AWS 1-Click infrastructure to keep track of and manage the buttons. The app, available from the Google Play store or Apple’s App store, allows you to easily claim a bunch of buttons at once and enable them.

You can purchase this button from Amazon.

Bluetooth Buttons

These buttons require a gateway or a device that captures the bluetooth signals from the buttons and transmits them over the Internet where they can initiate a server less app. You can learn more about gateways in our Bluetooth Gateway Roundup

LTE-M Buttons

The last category of buttons are those that register the button click using the special M2M networks provided by all of the cellular carriers. These devices are much, much cheaper than traditional cellular plans as they are intended for devices that send very small amounts of data.

The AT&T LTE-M Button

This is by far the easiest to set up of the M2M buttons. The button is supported by the AWS 1-Click Service; the cellular service is already included in the cost of this button.

https://marketplace.att.com

Estimote LTE-M Beacon

This product is meant for developers and works with the Estimote’s Events API. The unit runs javascript microapps on the device itself, and can call code for those apps from the cloud via the cellular network. In addition to the button functionality that is described earlier in this video, you can program this device to act as a GPS tracker or a BLE gateway.

You can purchase the Estimote LTE-M Beacon from their website

AT&T LTE-M Starter Kit

Your imagination is your only limit with this unit. Also meant for developers, it has several programmable buttons in addition to heat and humidity sensors as well as an on board accelerometer  You can also use expansion boards with this unit.

You can purchase this unit from AT&T’s IoT Store

Simplify Your Work Tasks with Help from Revolution11

Now that you have a pretty good idea of the varied and fascinating IoT products and services along with a better understanding of what these buttons are and what they can do — there’s bound to be a button for you! WIth so many ways of connecting to the cloud to run important IoT applications let Revolution11 get you started with any project, big or small. Ping us at inquiries@revolution11.com to get going today!

Download a PDF of this blog here: IoT Button Roundup

IoT Button Roundup